How to Read a Garment Size Chart Against Your Measurements
Shopping from a size chart can feel like solving a puzzle when one number points to one size and another points somewhere else. The chart may use body measurements, the product page may show the garment’s finished dimensions, and the size name on the label may not match what you wear from another brand. These are different kinds of information. Comparing them as if they were interchangeable is a common reason an otherwise promising purchase misses the fit you expected.
A more reliable method is to work in two passes. First, measure your body using the same landmarks named in the brand’s size guide. Then identify whether the chart describes the body or the garment. If the listing provides garment measurements, compare those with a similar item you own and account for the room needed for movement. Finally, use the cut, fabric, construction, and return terms to decide between sizes. This guide walks through that process, including what to do when your measurements land across different rows.
First, identify what the chart is measuring
A body measurement is taken around or along the person wearing the clothing. A garment measurement is taken on the finished item, either laid flat or around the garment. Those numbers answer different questions. A body chart usually helps identify the size category a brand intends for a wearer with certain dimensions. A garment chart helps show how large the item itself is, which can be useful for judging fit, ease, or length.
Do not compare your bust circumference directly with the flat width of a shirt. A flat-lay width is often measured from one side seam to the other; when doubled, it estimates the garment’s circumference at that point. It still does not equal a body measurement because the garment needs some room to sit over the body, and the amount varies with fabric, design, and intended fit. Measurements can also be taken at slightly different locations, so check the seller’s diagram or method before relying on a number.
Sizing research treats body dimensions and apparel sizing as related but distinct subjects. NIST’s report on body dimensions for apparel reviews measurement definitions and sizing references used in garment production and fitting. The practical takeaway is simple: check what a chart measures before using it, and use that brand’s own instructions rather than treating a size name as a standard across labels. NIST: Body Dimensions for Apparel.
Take your measurements consistently
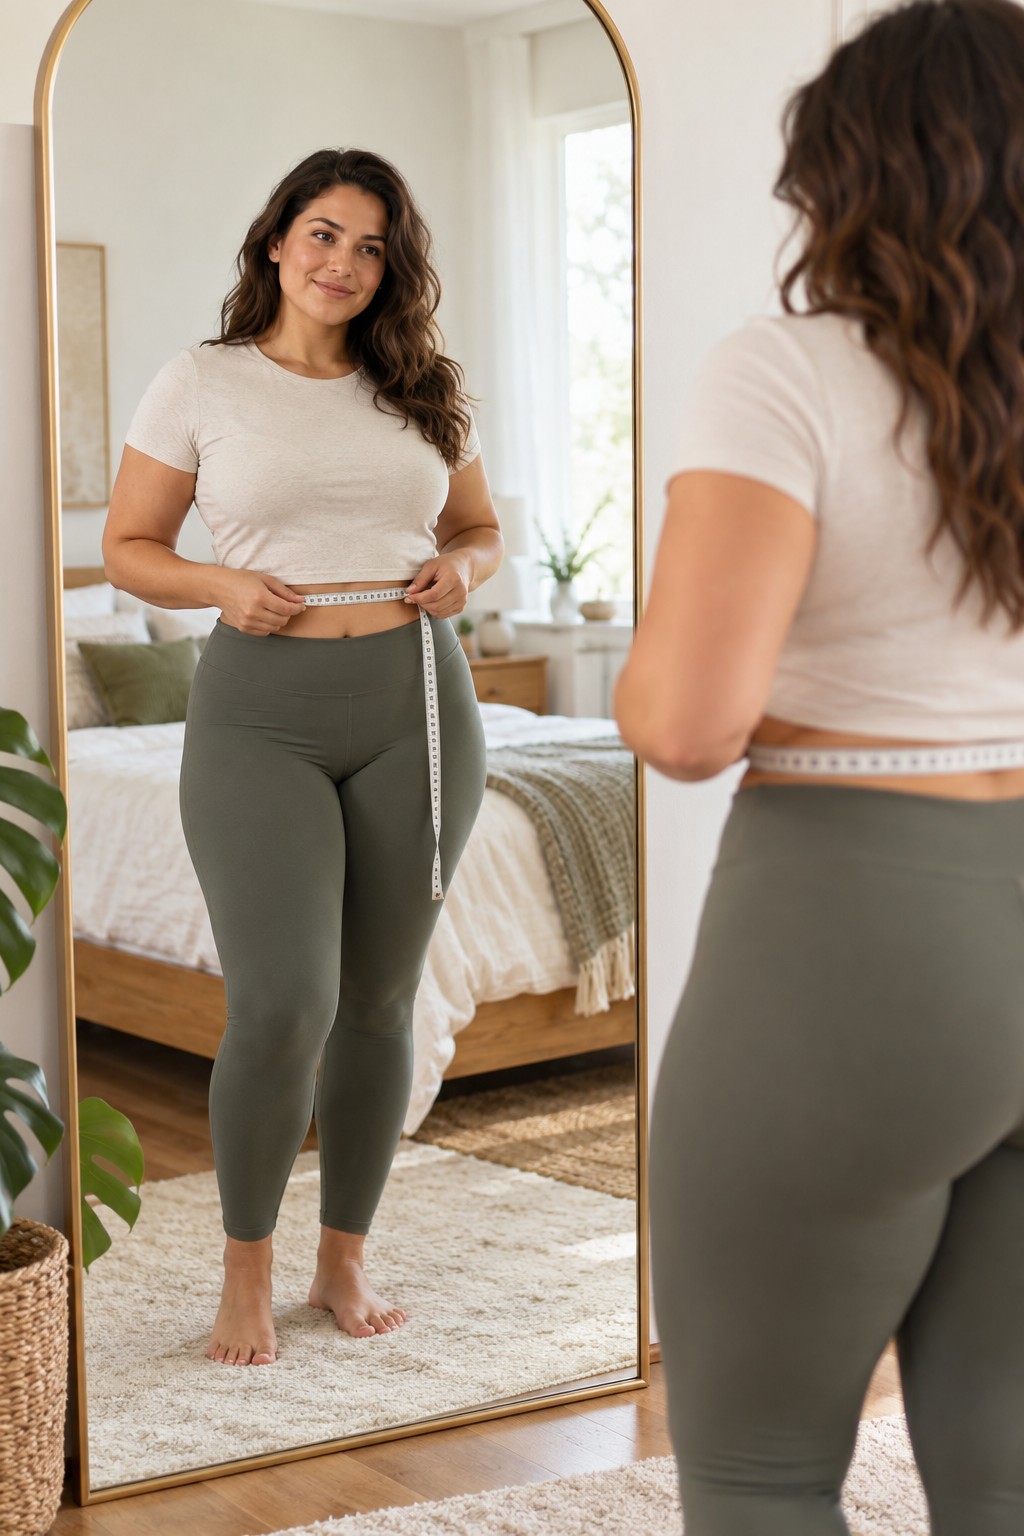
Use a flexible measuring tape, a mirror if helpful, and a note on your phone or paper. Measure over the undergarments or light clothing you would normally wear beneath the garment. Keep the tape level and close to the body without pulling it tight or letting it sag. Stand naturally; do not hold your breath, suck in, or force yourself into a posture you would not maintain while wearing the clothes.
If possible, ask someone you trust to help with points that are difficult to measure evenly, especially across the back. If you measure alone, use a full-length mirror to check that the tape is horizontal. Take each measurement twice. If the results differ, repeat a third time and record the value you can reproduce most consistently. This is a shopping reference, not a precise tailoring assessment.
Bust or chest
Wrap the tape around the fullest part of the chest, generally keeping it parallel to the floor and passing across the shoulder blades. Wear the bra or usual base layer you expect to wear with the garment. Keep the tape comfortably close without compressing the body. Some brands call this bust, chest, or full bust; follow the diagram and wording on the specific chart.
Natural waist
Many charts define the waist at the narrowest part of the torso, while some products use a different waist position, such as a high-rise or low-rise waistband. Check the brand’s diagram. If you cannot easily identify a narrower point, bend gently to one side and note where the body creases. Do not assume the waistband of your favorite trousers sits at the same level as the chart’s natural waist.
Full hip
Stand with feet close together and wrap the tape around the fullest part of the hips and seat. Check in a mirror that the tape remains level. This point matters for trousers, skirts, and fitted dresses, but the chart may call it hip, full hip, or seat. Use the seller’s stated location rather than guessing from the garment’s waistband.
Inseam and other lengths
For inseam, measure from the crotch seam down the inside leg to where you want the hem to sit. A well-fitting pair of trousers can be a helpful reference if you measure from the crotch seam to its finished hem along the inside seam. For a dress, sleeve, or rise measurement, follow the seller’s graphic; terms can vary. Record what the number refers to so you do not confuse body length with garment length.
Make a personal measurement note that stays useful
A measurement list becomes more useful when it records how and when you took it. Write down bust, waist, full hip, inseam, and any product-specific measurement you often need. Add the date and a short note about your method or underlayer. Measurements can change over time, and tape placement can shift slightly between sessions, so treat old notes as a reference to recheck rather than permanent facts.
Avoid turning the note into a single “true size.” Instead, record the repeated values you observed and compare them with each brand’s current guide. You might find that a particular brand’s woven shirts align with your bust measurement while its trousers work better when you compare hip and rise separately. That is a useful pattern about those garments, not proof that you should select one number everywhere.
Compare each measurement with the brand’s chart
Open the size guide on the product page or the brand’s current sizing page. Do not use a third-party chart or an old screenshot when the retailer provides a current one for the item. Confirm that you are viewing the correct department, garment type, and size range. A chart for tops may not work for trousers; petite, tall, maternity, and extended ranges may use different proportions or fit guidance.
Write down the row that corresponds to each measurement. Your bust may fall in one size row while your waist or hip falls in another. That is not a measurement error by default. Bodies do not always match a chart’s proportions exactly, and garments are designed with different shapes and ease. Note the spread instead of rounding all measurements toward one row.
For a fitted woven shirt, bust and shoulder fit may deserve more attention than the waist if the side seams can be altered or the shirt is designed with shaping. For pull-on trousers, hip and rise may matter more than the label’s waist range if the waistband is elastic. These are starting points, not universal rules: inspect the design, fabric, closures, and brand guidance for the actual garment.
Understand ease without guessing a magic number
Ease is the difference between a body measurement and a garment measurement at the corresponding point. A garment may be larger than the body to allow movement, smaller in a stretch area to fit close, or shaped differently across sections. There is no single amount of ease that makes every garment comfortable. A crisp shirt, stretch knit, tailored jacket, and elastic-waist trouser can all fit differently by design.
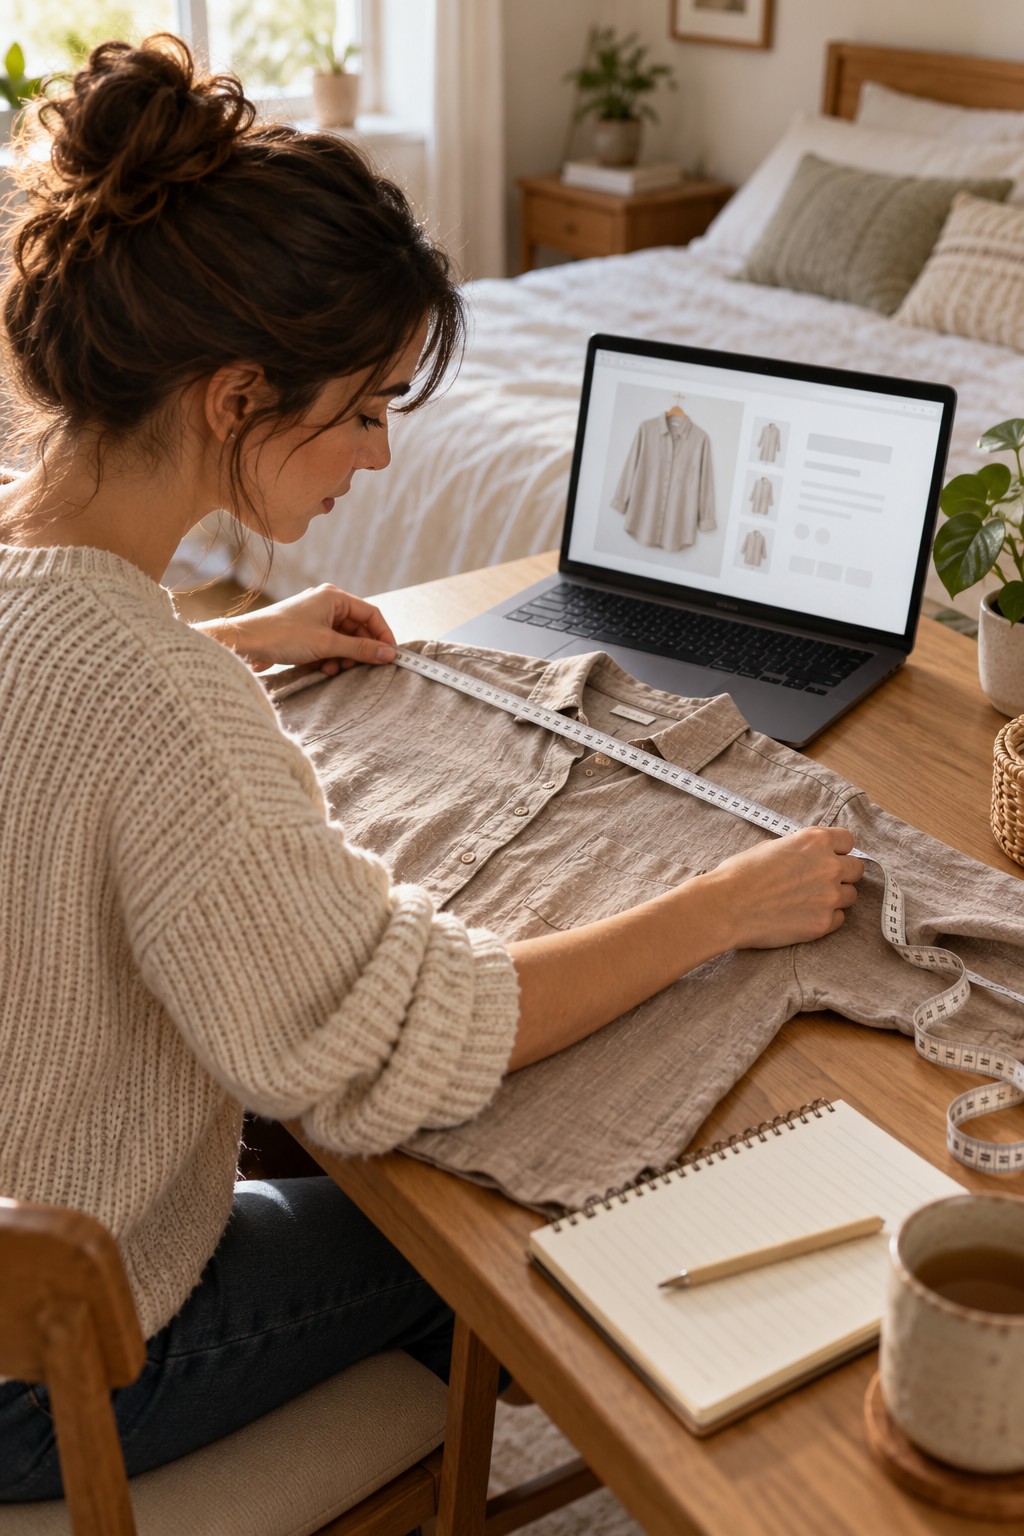
If the retailer provides garment measurements, compare them with a similar item you own that fits the way you want. Lay your reference garment flat on a table, smooth it without stretching, and measure at matching points: for example, pit-to-pit across a shirt or waistband across trousers. Double a flat width only if you need an approximate circumference, and remember that the seller may use another method. Use the comparison to judge proportions and intended looseness, not as a guarantee that two fabrics will behave the same.
Stretch adds another variable. A knit can extend when worn, but recovery, thickness, lining, and construction affect how it feels and returns to shape. A fiber label that includes elastane or spandex does not tell you exactly how much the garment stretches or whether it will feel supportive. If the brand describes the fit as compression, relaxed, oversized, or slim, treat that as a clue to investigate rather than a substitute for measurements.
Choose the measurements that matter for each garment
Tops and shirts
For a woven button-front shirt, check bust, shoulder width, sleeve length, and body length. If you are between sizes at the bust, consider whether the shirt has darts, a relaxed cut, or a button placket that may pull. The best choice may depend on whether you want to wear it tucked, layered, or open. For a knit tee, shoulder and length may matter as much as bust because stretch changes how the garment sits.
Dresses
A dress combines several fit points, so compare bust, waist, and hip when the design is fitted. Check garment length against your height and intended shoes if the product page provides a model height or length measurement. A loose shift may not need the same hip fit as a body-skimming knit dress. If a dress is cut on the bias or has a lining, fabric behavior can affect how it hangs; use product notes and return terms to manage uncertainty.
Trousers and jeans
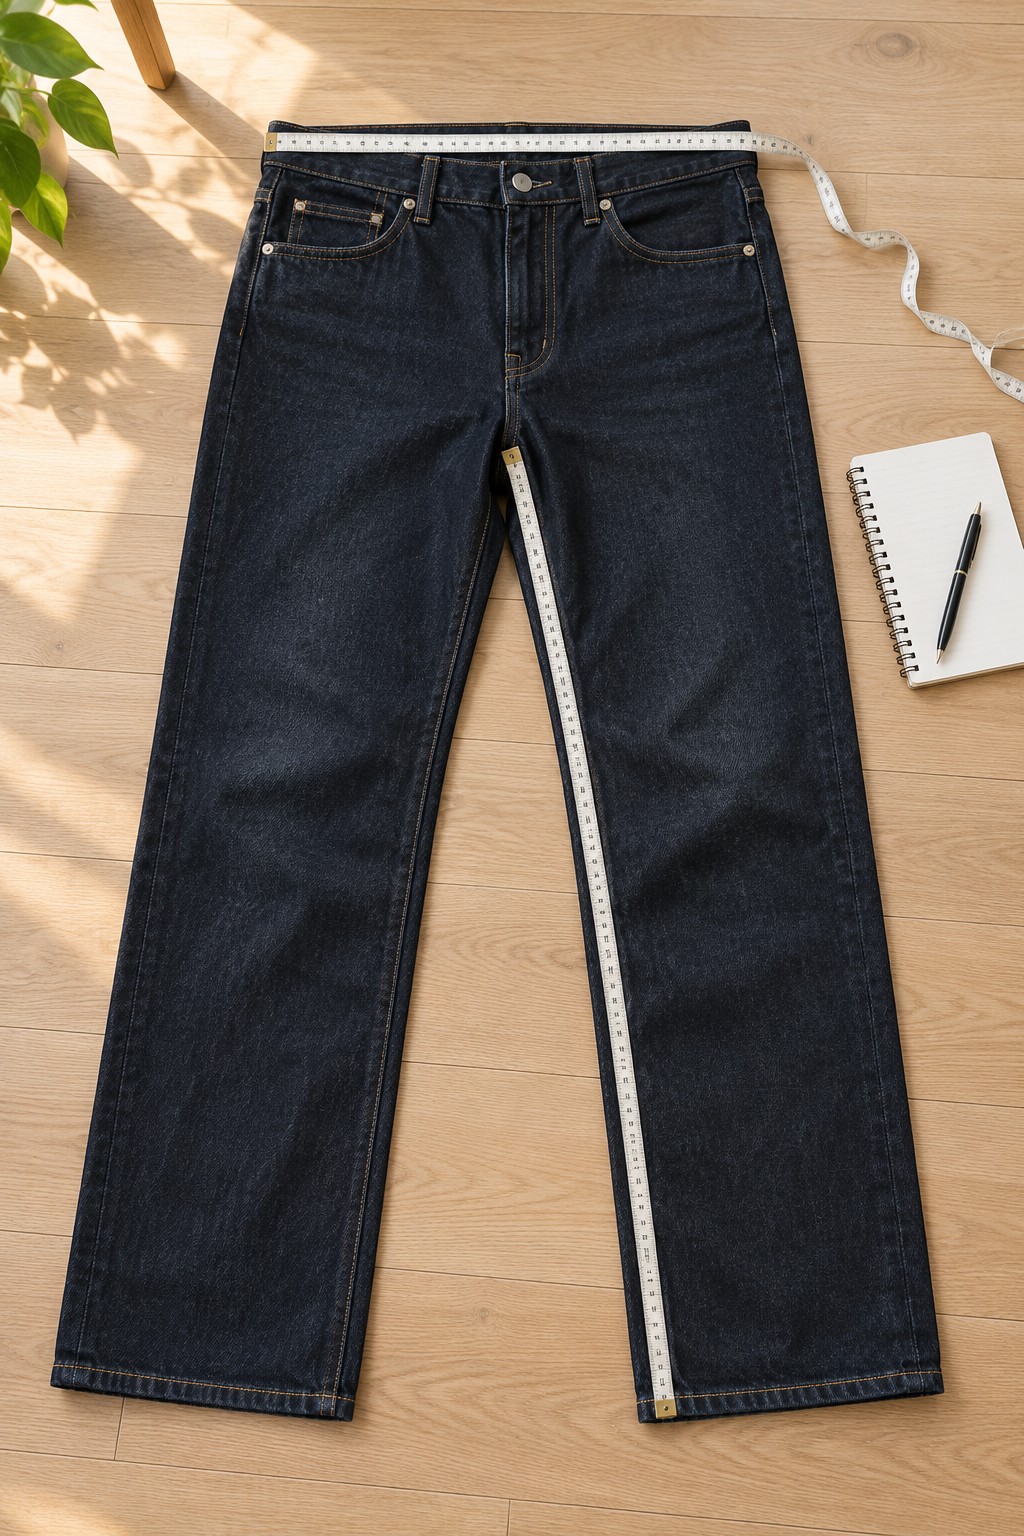
For trousers, look beyond waist and hip. Rise affects where the waistband sits; inseam affects hem length; leg shape changes how fabric falls over the thigh and calf. Check whether the chart describes body measurements, garment measurements, or both. A pull-on style with elastic may accommodate a range differently from rigid denim with a fixed waistband. If you own a similar silhouette, compare its waistband, rise, and inseam.
Jackets and coats
Check shoulder, bust or chest, sleeve length, and intended layering. A jacket meant to fit over a sweater needs room for that layer, while a lightweight topper may be designed closer to the body. Product photographs can help show silhouette but cannot prove that the sleeve or shoulder will fit you. Use the item’s written measurements and the seller’s fit notes wherever available.
What to do when you fall between sizes
Start by identifying the measurement that affects comfort or closure most for that item. A non-stretch woven garment with a fixed button or zipper may need more room at the largest relevant body measurement. A knit or elastic-waist design may offer more flexibility, but check the product’s fit description and construction. If the brand explicitly says “size up” or “size down,” understand whether that guidance refers to a close or relaxed look and whether it is specific to that item.
Then consider how you want the piece to fit. If you prefer room for a layer, movement, or a looser silhouette, the larger option may align better. If a garment is intentionally oversized, sizing up may make the sleeves or shoulders too long. If sizing down could restrict a closure or change the garment’s intended drape, it may not solve the mismatch. Compare garment measurements with a similar item, when available, and use the return policy to decide whether testing two sizes is practical.
Do not choose a size solely because a label matches what you wear elsewhere. Clothing size names are not a dependable cross-brand measurement system. A chart can narrow the choice, but garment construction and your preferred fit still matter. Keep a note of which size you ordered and how the actual item fit so the next purchase from that brand starts with better evidence.
Use product information as part of the chart
The size chart is only one part of the listing. Review the fiber content, lining, closure, stretch notes, fit description, garment measurements, model details, and care instructions. Look for customer reviews that describe the same fit issue you are evaluating, such as a narrow shoulder or long inseam, rather than relying only on the overall rating. Review dates and garment changes can matter; a product may be revised or have multiple versions.
Check the return and exchange terms before ordering, especially for final-sale products or purchases from a marketplace seller. Confirm who pays return shipping, the time window, and whether the item must be unworn with tags. This is a practical decision step, not a reason to buy several sizes automatically. If you are unsure about a costly or event-specific garment, ask the retailer a precise question using your measurements and the garment’s published dimensions.
A quick measurement-to-size workflow
- Find the current size guide for the exact brand and garment category.
- Identify whether each chart number refers to your body or the finished garment.
- Take the body measurements named in the chart, following the brand’s diagram.
- Compare bust, waist, hip, and relevant lengths separately; note when they land in different rows.
- Check fabric, closure, cut, stretch, and fit notes to identify the most important point for that garment.
- Compare published garment measurements with a similar item you own, if the seller provides them.
- Read the exchange policy and keep a note of the size ordered and the resulting fit.
This method cannot guarantee a perfect fit from a screen, but it replaces vague size-label comparisons with information you can use again. The next time you shop from the same brand, your notes can help identify which cut or size worked in practice.
Common questions about clothing size charts
Should I size up if my measurements are between two sizes?
Not automatically. Check which measurement falls between sizes, how the garment closes, its fabric and cut, and the fit you want. A fixed woven waistband may call for a different decision than a stretch knit. Use garment measurements or the brand’s item-specific advice when available.
Are body measurements the same as garment measurements?
No. Body measurements are taken on the person; garment measurements are taken on the finished item. Garments usually need a designed amount of room or ease, and that amount differs by garment and fit. NIST’s apparel sizing reference discusses body dimensions used in apparel design and fitting. Read the NIST report.
How often should I measure myself?
Recheck when you have a reason to think your measurements or method changed, or when an old note no longer matches how clothing fits. Keep the date with your notes. You do not need to measure before every purchase if your information is current and the brand’s chart is clear.
Can I rely on a size chart from a marketplace?
Use the chart provided for that exact listing, but check who made the item and whether the chart identifies body or garment measurements. If information is missing or contradictory, ask the seller before ordering or choose a seller with clear exchange terms. Do not assume a marketplace uses one universal chart for every brand.
Make the chart answer a specific question
A size chart works best when you use it to answer, “How does this garment’s measurement system compare with mine?” Start with a consistent body measurement, check the chart’s definitions, and then inspect the garment’s design and fit notes. If the numbers point to different rows, use the garment’s structure and the fit you want to decide which point deserves priority. Save the result after the item arrives. Over time, those notes turn an opaque size label into a more useful record of what works for you.
Keep these outfit ideas handy.
Save this guide on Pinterest (opens in a new tab)